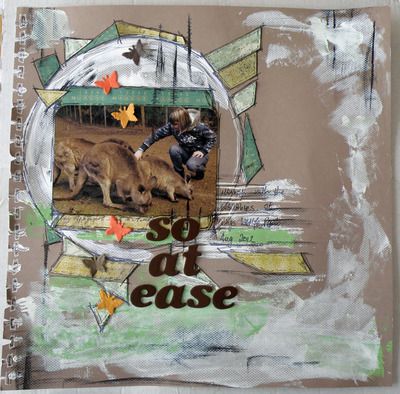
This is what I LOVE to do... create a scene... an idea....
I've looked back on some of the dresses and backgrounds I've created in the past and decided to pool them together in one post.
So here is some of my collection....

Using Tea-bags with their strings......

ended up getting rid of the yellow tags.

-----------------------------------------------


.... with little print from a vintage romance novel both using the print in the usual torn out fashion and gluing it into the background and peeling it away.

------------------------------------------------------
This photo was Hannah jumping off a rock at the beach... adding a skirt and wings... changed the whole idea...


An Evening Out...

Dress is made from tissue paper....with a splash of silver paint and gemstones

------------------------------------------
I've used a vintage Music score cover for my background then set about fashioning a dress in mists and music paper.


-------------------------------------------------


Here's how to make of one of the dresses:
Cut out the skirt shape from music paper and crease

Do the same for the underskirt (I've used my handmade paper)

Glue skirts together and glue on the front of a waist band

Using a little rose petal as a bodice, glue to the inside of the band

Wrap around and glue the waistband to the back


Loop the little feather to make some shoulder straps each side of the bodice
and adhere to the the back.

Add some trim around the waist just to finish it off!!

------------------------------------------------------
Here's a bit of a tutorial on how to make a paper dress onto a mannequin ...
I've had a bit of a play here with orange....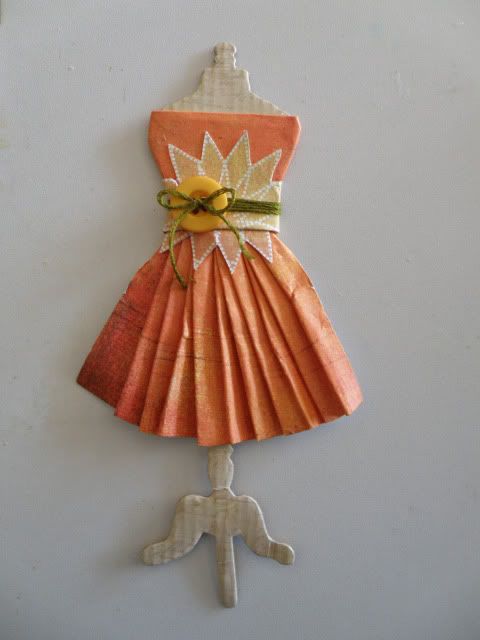
Find a mannequin either in your stash or on the net and cut it out - or be clever enough to draw one - cut out of cardboard though - it just stabilises it a bit more
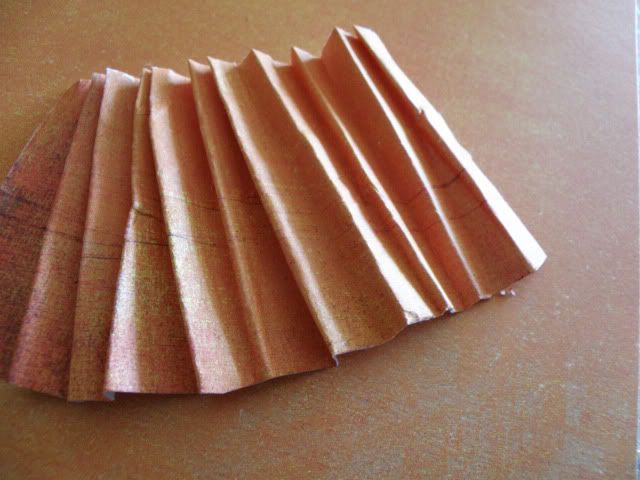
Cut out the desired length of the skirt, spray with water first though (its easier to fold that way) and pleat
. Glue your pleated skirt to the mannequin
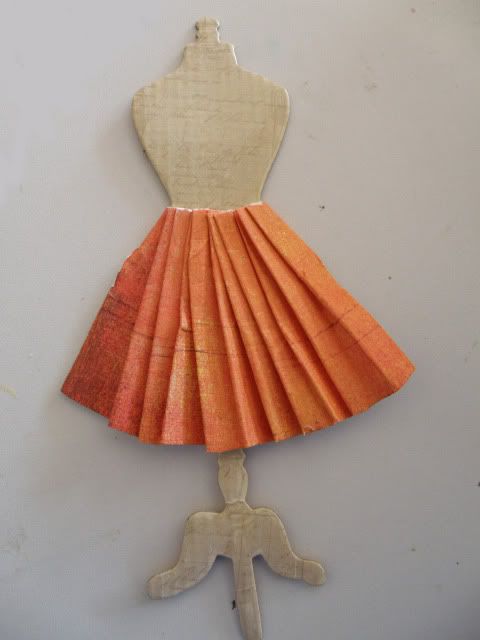
Now its time to add the bodice - easy enough to wrap a strip around the bust of the manequin (I sprayed the paper with water first so it would adjust around the shape better. Glue it on
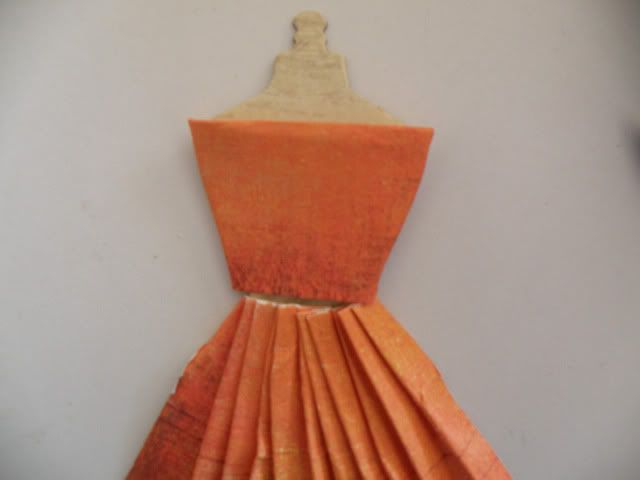
Find a mannequin either in your stash or on the net and cut it out - or be clever enough to draw one - cut out of cardboard though - it just stabilises it a bit more
Cut out the desired length of the skirt, spray with water first though (its easier to fold that way) and pleat
. Glue your pleated skirt to the mannequin
Now its time to add the bodice - easy enough to wrap a strip around the bust of the manequin (I sprayed the paper with water first so it would adjust around the shape better. Glue it on
I cut a flower shape from this paper, you could use anything from cutouts, to actual flowers, or just a strip of paper, fabric... be creative - there are SO many options limited only by your imagination!
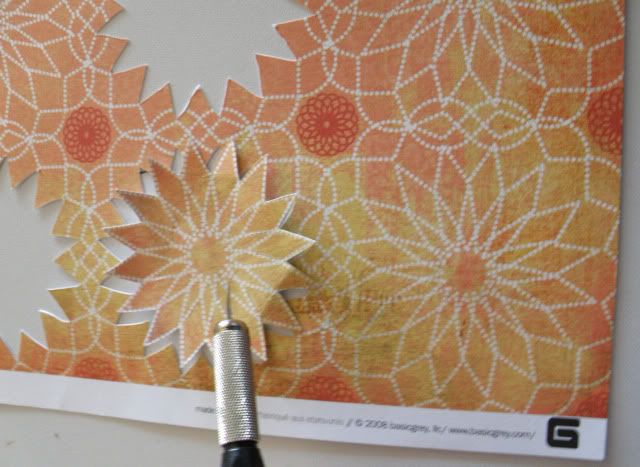
Here I've placed a crease in the flower cut-out, so it fits nicely on the waist
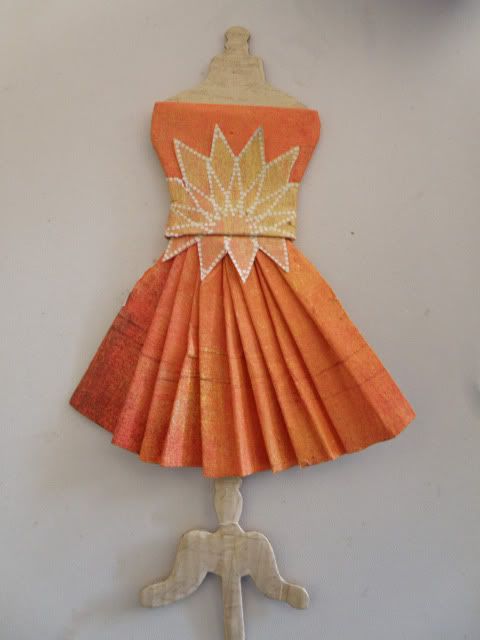
And bind some embroidery thread around it to give the waistline some definition
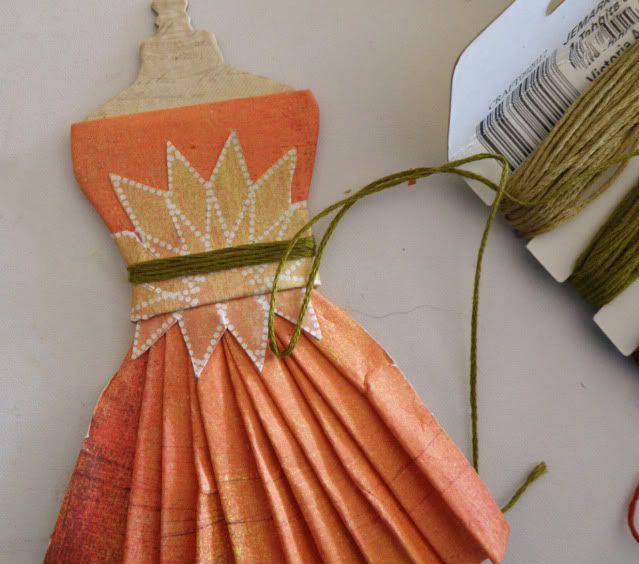
Finish the little dress off with a lovely big button - and a little bow.
And bind some embroidery thread around it to give the waistline some definition
Finish the little dress off with a lovely big button - and a little bow.
--------------------------------------------------
The background is the front cover of a music score.


------------------------------------------------------

--------------------------------------------------------
The use of paper cut out dress forms draped with gauze

I've drawn and painted (watercolour pastels) the gumnut blossoms and leaves then cut out


---------------------------------------------------
Prima....
Here's a Tutu covered in Prima flowers!
Its hard to photograph without a body being in it filling it out so the stretched satin is skin tight!
Never mind..... a little pillow stuffed inside has to do!!


---------------------------------------------------------------
It's great to group together a genre... from over time.. its been fun.